Learn SvelteKit - Part 2: Routing In SvelteKit


Learn SvelteKit
You are currently reading an introduction to SvelteKit blog series. This series takes you from the start of SvelteKit through the essential API's to get you up and running using SvelteKit for your projects.
In the previous chapter of this series we reviewed what SvelteKit is and what it offers to the ecosystem. We also learned how to setup a base application and review one of the main core concepts of the framework: Routing.
Routing is essential on any web application. It’s how the application organizes the code to make it work for the web world that is based on URL routes.
In this chapter we will dive a bit deeper onto the routing system used by Svelte, will learn about the different files available, how they work and what uses cases each them have. At the same time we will start building the TODO application along the way.
Let’s get started!
File System Router
The heart of the framework and the motor that get everything running is the novel filesystem-based router.
I say novel because the main difference with other filesystem-based router solutions out there is that SvelteKit uses the folders inside the src/routes folder as the description of the route.
You can change
src/routesto a different directory by editing the project config.
This means that
src/routescontains the root routesrc/routes/blogcreate the/blogroutesrc/routes/topics/[topic]creates a route with the parametertopicfor example/topic/javascriptor/topic/svelte.
Each folder inside routes can have or more route files. This files are represented by the + prefix.
-
+page.sveltedefines a page under the route, it will contain the code to be rendered, an Svelte Component -
+page.jsThis is another special file that will allow you to define the logic to perform data load process meant to be run before the page renders -
+page.server.jsThis is a file marked to run only on the server, this means that you can write data loading logic that can only run in the serve, like database access.
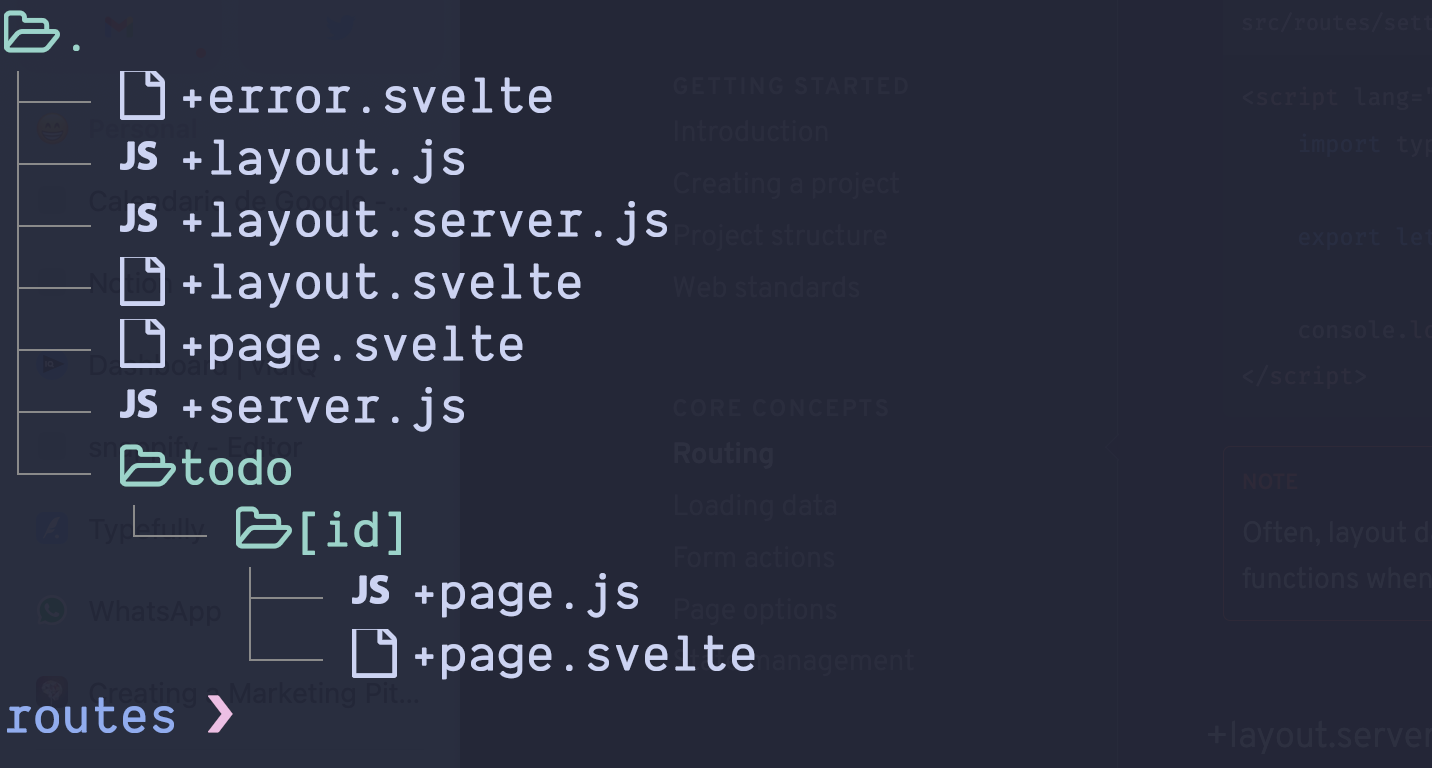
There are more files marked with the
+prefix that will be reviewed later in the article
Let’s say you want to define your index page, the first page of your application. For that, you’ll create a +page.svelte under src/routes. This component is just an Svelte component like:
Here's an example of what a SvelteKit home page might look like. This file is named
+page.svelte.
Server Side Rendering (SSR)
SvelteKit comes preconfigured to perform Sever Side Rendering (SSR), this means that the component will render twice, once in the server for the initial request and once in the client (hydration process).
Remember a page in an SvelteKit application is just a Svelte Component that has SSR and hydration.
Let’s add a second route src/route/todos/+page.svelte this will be accessible when visiting the/todos route
Why does SveltekIt use this
+prefix? the+prefix is reserver for SvelteKit reserved files. The+page.sveltename is a reserver name allowing SvelteKit to ignore other files or components. This allows you to collocate code, utilities or components related to that page under the same folder structure.
Let’s imagine that these two files are part of your awesome new application, you fire up the console and run pnpm dev, and visit the localhost url where you can see the main route.
But, how do you navigate to the blog pages? Remember this is just Svelte components!
To allow users to navigate you can simply drop an anchor element pointing to the desired route:
Is important to note that SvelteKit use simple HTML anchor tag
ato define the links for the application, there is no custom component around it, simple and effective.
The Layout Component
Now your users can navigate from the root page to the blog page, but how they can come back? You’ll need to write an anchor tag on the other page too right?
Is there a way to share structure among pages?
The answer is YES the +layout.svelte file
There is another reserver file name: +layout.svelte. Which is just another Svelte component.
The main difference is that the layout component doesn’t create a page, but it creates as it names indicate a layout. A way to share structure among child routes.
Each route folder can hold a +layout.svelte this component can render anything you need plus a <slot /> . Each layout will wrap the +page.svelte components defined along it and under it.
This means that if you create a layout under src/route/+layout.svelte it will become the root layout and will affect every other page created, exactly what we’re looking for:
Now every page will be rendered inside this layout at the slot place, so every page will have a navigation and a footer.
<slot />is a special Svelte component used to declares that component will receive some external content. You can think of it as thechildrenprop in React.
Dynamic Routes
Finally, let’s review that dynamic route, the one that receives a parameter and is named as src/routes/todo/[id]
The first thing is to add a page to be able to see something in the browser, so let’s add a +page.svelte under it.
Here SvelteKit will render the content of this new +page.svelte every time the browser request a route that matches /todo/<whatever>
This new page will inherit the same +layout.svelte as the previous ones, but you can add it’s own layout too by creating a new +layout.svelte file under the same folder.
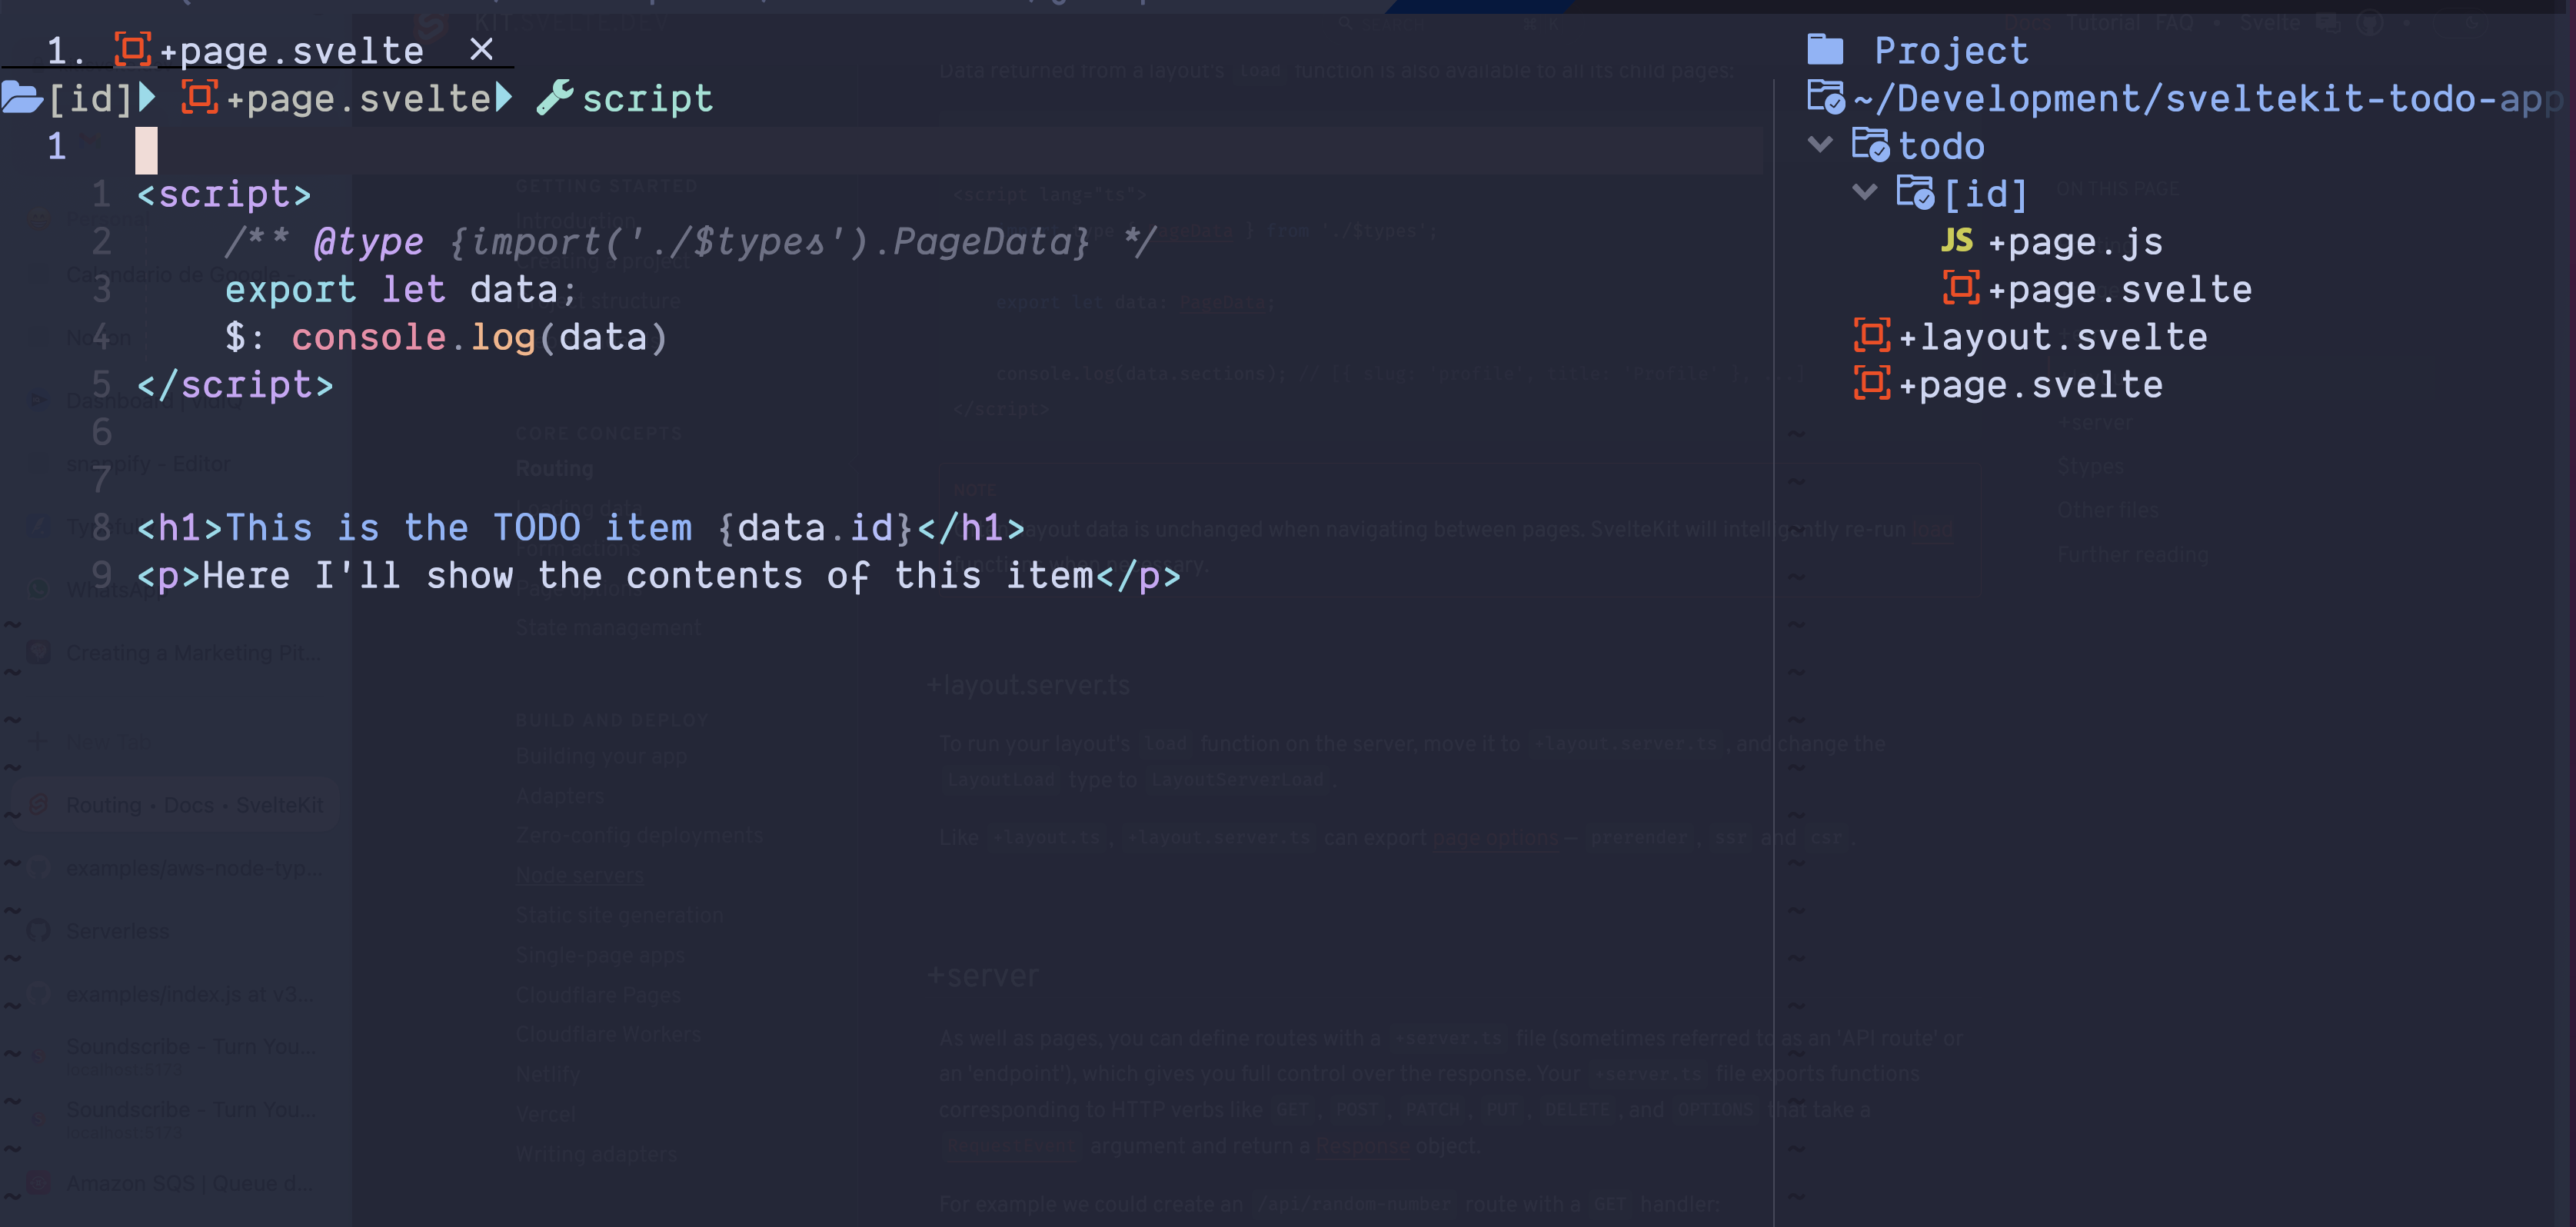
Let’s set the content of this file to show the id parameter.
Again, this is a simple Svelte component, but it have an special prop data
data here is an special prop that SvelteKit exposes to allow you to retrieve information from the server side process, its typed or annotated as PageData . This type is created based on what the server side returns.
This is the first encounter with the data loading approach that we will review deeper in the next chapter.
Ready to pick up the pace?
Enter your email and receive regular updates on our latest articles and courses


We're here to help.
Sign up for our FREE email course
- ⭐️ Portfolio Building: Learn how to build a badass developer portfolio so you can land that next job
Data Loading
For now, let’s create a sibling file named +page.js
This file is part of the data loading process, it will hold the required logic to retrieve data and pass that to the sibling svelte component that represents the page.
This file runs in the server and client during hydration.
The content of this file, for this step of the application will be very simple:
This is a very simple function, but there is a lot to unpack here, we will fully review the data loading process in the next chapter.
This file exports a well-known function named as load this is a restricted name that SvelteKit use to perform data loading.
This function have access to the url parameters defined when you created the route in this case the route was named as routes/todo/[id] therefore, the params argument there will have access to the id variable.
By just returning an object, SvelteKit makes that id accessible inside the data prop in the svelte component.
Go ahead and visit the site (remember to have the service running with pnpm dev), you’ll see something like this when visiting the url http://localhost:5173/todo/1

Conclusion
At this point, you learn how to create routes inside Sveltekit, each route is represented by a folder and inside that folder you’ll found an svelte component named as +page.svelte that represents the page that will be rendered when visiting that route in the browser.
You also learn that you can share layout structure by create a +layout.svelte file inside a route. This layout will affect all the nested routes below it.´
Finally we reviewed how to create dynamic routes by naming the folder with [] square brackets, to have access to that url parameter you need to use a data loading function that lives inside the +page.js file, sibling to the page component inside that route.


Ready to pick up the pace?
Enter your email and receive regular updates on our latest articles and courses
We're here to help.
Sign up for our FREE email course
- ⭐️ Portfolio Building: Learn how to build a badass developer portfolio so you can land that next job