Learn SvelteKit - Part 1: SvelteKit Project Setup and Core Concepts


Learn SvelteKit
You are currently reading an introduction to SvelteKit blog series. This series takes you from the start of SvelteKit through the essential API's to get you up and running using SvelteKit for your projects.
Introduction
SvelteKit is a robust web application framework that offers a modern, component-based approach to building web applications.
SvelteKit can be considered the Next.js of Svelte.
In this guide, we'll take you through the basics of SvelteKit and show you how to build your own full-stack web applications from scratch. Whether you're a seasoned developer or just getting started in web development, this guide will provide you with everything you need to know to get up and running with SvelteKit.
So let's get started!
Why SvelteKit is an excellent choice for building web applications
Before diving into how to work with SvelteKit, the first questions you should answer is why you should choose SvelteKit for your next project.
SvelteKit offers several advantages and features that can be found in other frameworks, but you’ll get them here with a twist.
- Fast performance: SvelteKit's compiled components run directly in the browser, resulting in faster load times and better performance overall.
- Easy to learn: SvelteKit is based in Svelte, and the simple and intuitive syntax makes it easy to start building web applications, even if you're new to web development.
- Flexible and modular: SvelteKit's component-based architecture makes it easy to build modular, reusable components that can be used across multiple projects.
- Server-side rendering: SvelteKit supports server-side rendering out of the box, allowing you to easily build applications that can be optimized for SEO and provide better initial load times.
- Built-in routing: SvelteKit includes built-in routing capabilities, making it easy to create complex, multi-page applications without the need for additional routing libraries.
So, whether you want to tap on the power of SvelteKit because it clicks on you or just out of curiosity, this guide will help you get up to speed.
But before diving into the code, let’s review some concepts to allow everyone to be on the same page.
What is Svelte
If you’re already familiar with Svelte, you can jump to this section; if not, stay around.
It’s very similar to other Javascript Frameworks available today. The main difference with other tools like React or Vue is that Svelte doesn’t use the so-called “Virtual DOM”. In fact, Svelte is a language+compiler that takes the code you write in “the Svelte way” and creates a significantly optimized imperative code that directly manipulates the DOM as required.
At some point, Svelte was known as “the magically disappearing framework” since after the application is built, there is no framework runtime inside your bundle.
Another feature of Svelte is that it is truly reactive, this means that a simple change in a variable will immediately be reflected in the UI.
As mentioned before, Svelte can be considered a language in its own right. It uses what is known as a Single File Component. This means that a component is represented by a single .svelte file, which contains the UI definition of the component. This is written in simple HTML.
The dynamic and business logic of the component is written in plain old JavaScript. This is found between the <script> tags.
Lastly, the style that will be applied (scoped) to the component is written between the <style> tags.
In general, terms, if you're familiar with JavaScript, HTML, and CSS, you're ready to dive into Svelte:
This example is a simple Svelte component that takes in a
nameprop and displays a greeting.
Why Do I Need SvelteKit?
While Svelte is an excellent framework for building web application UIs and provides you with a state-of-the-art Developer Experience, there are more complete solutions for building full-stack web applications. That's where SvelteKit comes in.
When building a complete application, there are many moving parts that you need to handle, from routing to the data-loading process. SvelteKit packs all of that into a comprehensive tool that delivers an opinionated and optimized way of building such applications.
When you build an application with SvelteKit, you’ll get a unified development experience that includes everything from server-side rendering to client-side routing, data fetching, and data mutation.
Ready to pick up the pace?
Enter your email and receive regular updates on our latest articles and courses


We're here to help.
Sign up for our FREE email course
- ⭐️ Portfolio Building: Learn how to build a badass developer portfolio so you can land that next job
Setting up a SvelteKit project.
A few core concepts make up this framework, and we will dive deeper into each in the following articles of this series.
In this article, you’re getting an overview and learning how to set up a project so that you have a solid foundation to work off of before going further.
The best way to learn new concepts is to get your hands dirty with code.
To accomplish that, let’s set up a new SvelteKit project, this will help you get a sense of how the framework works, and also, this setup will act as an overarching project that we will build on each article of the series.
Let's create a new project using the following command in your terminal.
Yes, we will build another TODO app. Why? Because the application requirements are well-known by everyone and are not complex, this will allow you to focus on the framework concepts and features instead of the application logic.
This command will show you a series of questions you must answer to generate the base application. Follow the prompt, and at the end, you’ll have a set of files and folders ready to be used.
Important the second question will ask you what type of scaffold you want. Choose "Skeleton project" .
Optional Step: Add TailwindCSS Configuration
This is an optional step. You can add Tailwindcss configuration by using this community package
This will configure Tailwind and install all the dependencies.
Now, the project is ready. You can execute npm run dev in the terminal to run the application in development mode. Visit http://localhost:5173 in the browser to see the result.
Not impressive at this point. Remember, you just setup the skeleton of an app.
Let’s review the files and folders that were created
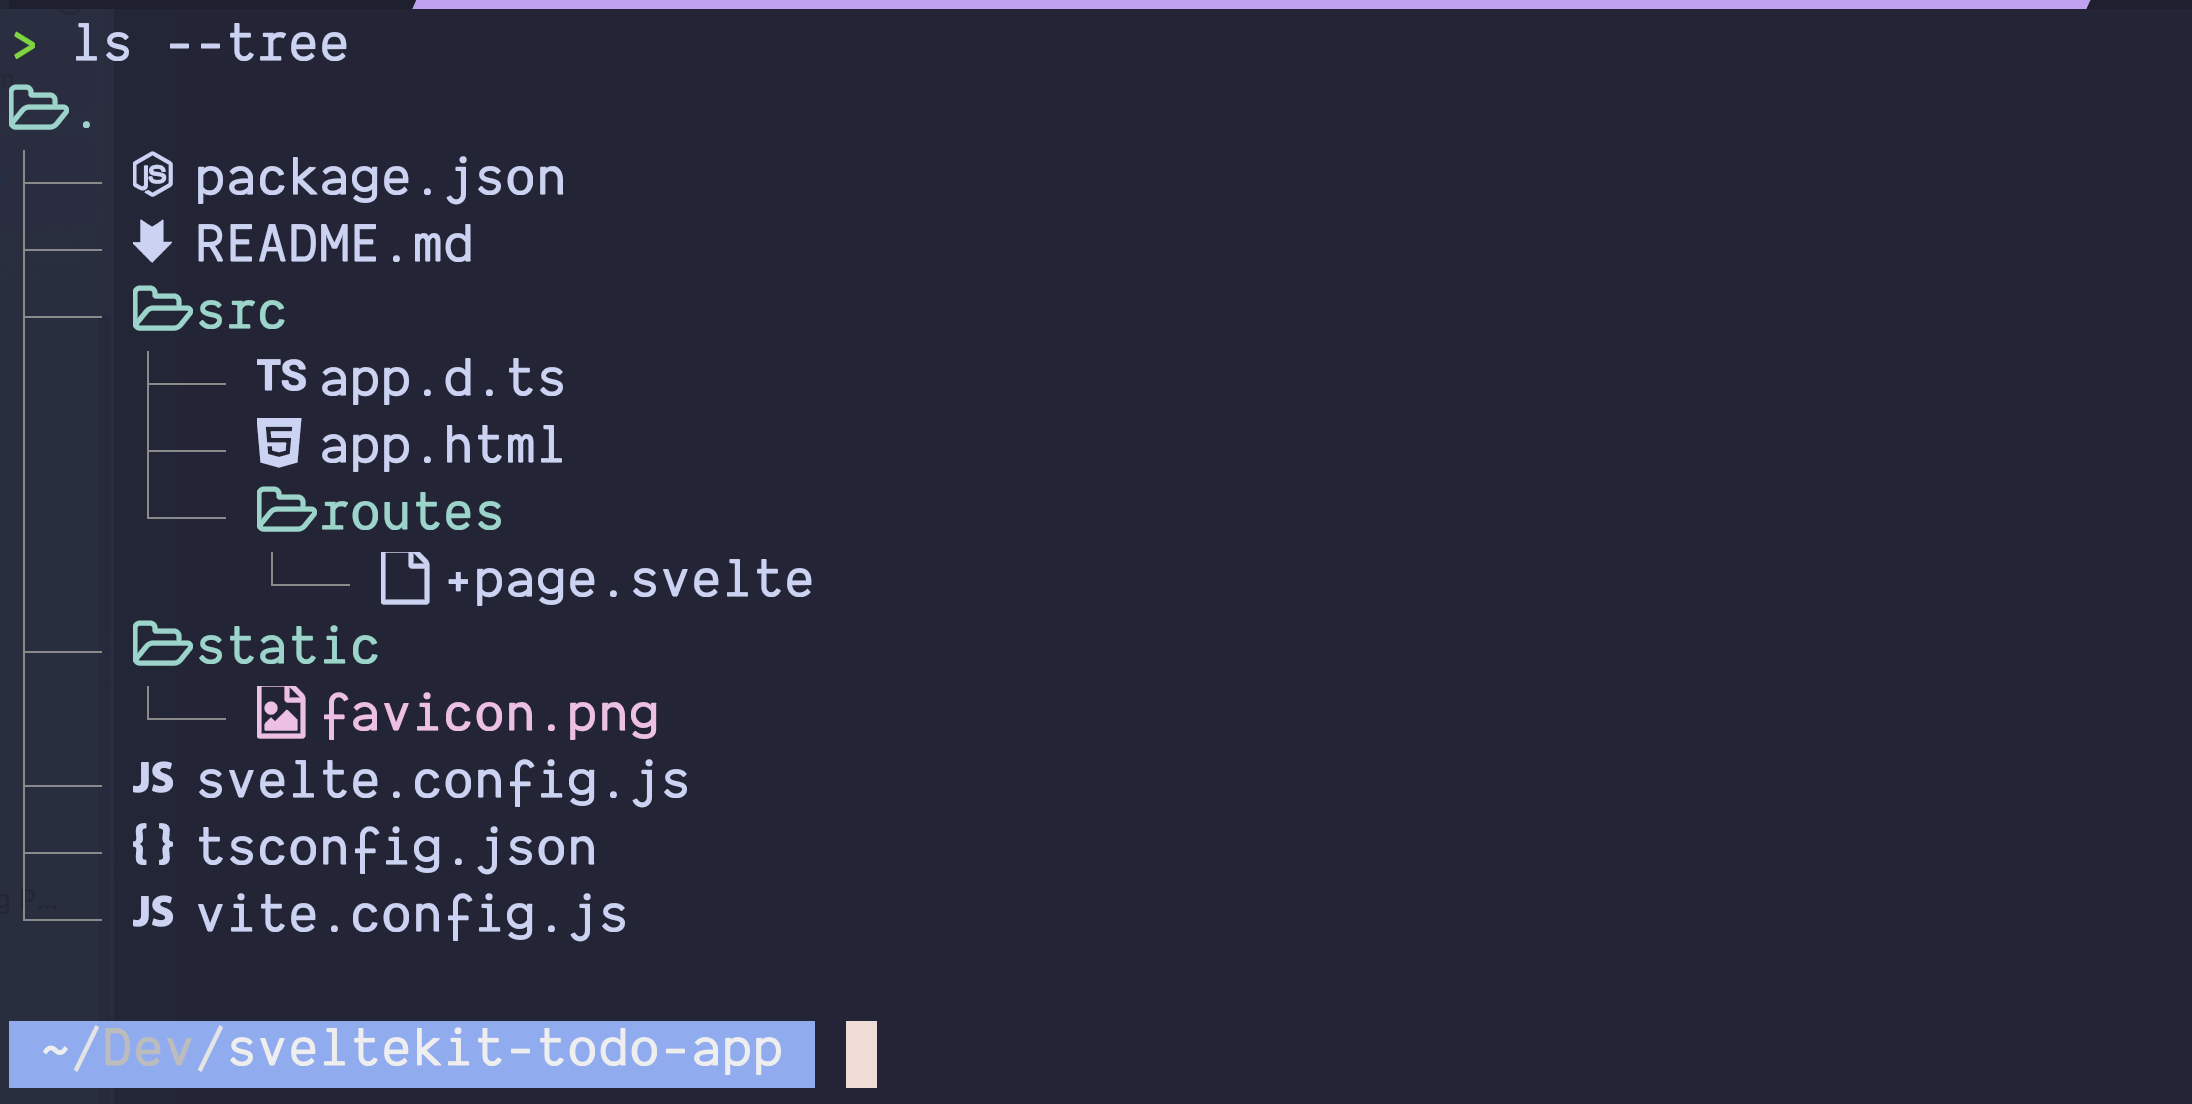
The image above shows all the files generated by the script. We will review and manipulate mostly of those living inside the src folder.
The SvelteKit’s routing system is a file system approach to define a route. You need to create a folder inside the src/routes folder. Each folder you create there can have one or more route files. These files have a special naming convention. They all use the + prefix.
In the image above, you can see one of those special files, the +page.svelte file that lives in the root of src/routes. That file represents the root route, your “index” route.
This +page.svelte files are just svelte components that get rendered as a page in the browser.
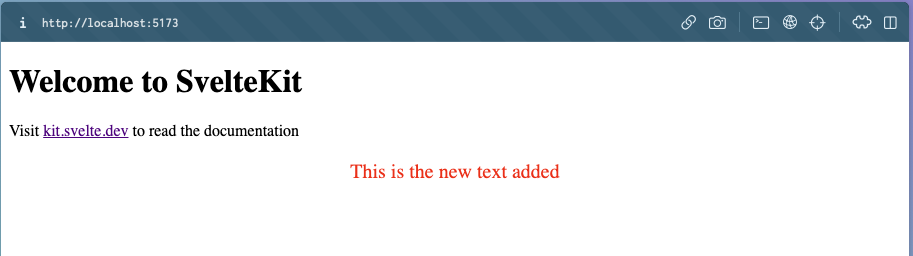
Go ahead and update the contents of +page.svelte:
You’ll see the immediate result in the browser:
The routing system has other files we will review in the next chapter, like server-side code for the page component and nested layouts.
In the same image, you can see that inside src there are two other files:
app.html- the entry point of the applicationapp.d.ts- holds global type definitions.
Reusable Components
Now, you are off to the races to develop your SvelteKit application. The simplicity of Svelte makes creating new pages (+page.svelte files) a breeze and feels like HTML.
If you want to create reusable components, you can do it directly in the route folder. Those files will not be considered pages since they are not part of the naming convention and don’t use the + prefix.
Speaking of conventions, it’s common in the SvelteKit world to hold the shareable components and utilities inside the $lib folder. This $lib is a simple alias offered by SvelteKit that points to src/lib folder allowing you to import your code easily.
Imagine you create a common title component, and create the file under src/lib/components/Title.svelte now you want to import that into +page.svelte, you will do it like the following snippet.
Conclusion
In essence, SvelteKit is a dynamic and feature-rich framework that's ideal for building modern web applications. Its intuitive syntax, component-based approach, built-in routing, and server-side rendering make it an excellent option for your upcoming web projects.
The next step in this journey will be to dive deep into the routing system to start building the todo application!


Ready to pick up the pace?
Enter your email and receive regular updates on our latest articles and courses
We're here to help.
Sign up for our FREE email course
- ⭐️ Portfolio Building: Learn how to build a badass developer portfolio so you can land that next job
Learn More Svelte
Courses


Full Stack Web3 and Blockchain Development on Ethereum with SvelteKit

Up and running with Svelte 3


